Akshay Kumar

2024 Comprehensive Guide to Growing Your YouTube Channel: Tips, Strategies, and Best Practices

2024 Comprehensive Guide to Growing Your YouTube Channel: Tips, Strategies, and Best Practices

A YouTube channel is a dedicated page on the YouTube platform where users (individuals, businesses, or organizations) can upload, organize, and share videos. It serves as a profile or home base for all the content a creator uploads, and subscribers can follow the channel to receive updates whenever new videos are posted. Key Features of a YouTube Channel: Types of YouTube Channels: A YouTube channel serves as a platform where creators can build a community, share their passion, entertain, educate, or promote their brand, and even earn money through their content. YouTube channels are important for a variety of reasons, offering value for individuals, businesses, and organizations alike. Here are some of the key benefits and importance of having a YouTube channel: 1. Content Sharing and Reach 2. Brand Building and Promotion 3. Educational Value 4. Community Building and Engagement 5. Monetization and Revenue Generation 6. Search Engine Optimization (SEO) Benefits 7. Cost-Effective Marketing 8. Entertainment and Inspiration 9. Career Opportunities 10. Market Research and Feedback Summary A YouTube channel is important because it serves as a versatile tool for reaching a large audience, building a brand, educating viewers, generating income, and creating a community. Whether for personal expression, business growth, or education, it offers numerous opportunities for impact and success in the digital world. Creating a YouTube channel and growing it into a successful platform involves several in-depth steps. Hereโ€™s a comprehensive guide on how to create and optimize a YouTube channel, covering everything from setup to growth strategies. 1. Setting Up Your YouTube Channel Step 1: Create a Google Account Step 2: Create the Channel Step 3: Customize the Channel 2. Uploading Your First Video Step 1: Content Planning Step 2: Recording the Video Step 3: Editing the Video 3. Optimizing Video for SEO Step 1: Video Title Step 2: Video Description Step 3: Tags Step 4: Thumbnail 4. Channel Optimization Step 1: Channel Layout Step 2: Playlists Step 3: Featured Channels 5. Promoting Your Channel Step 1: Leverage Social Media Step 2: Collaborate with Other YouTubers Step 3: Use End Screens and Cards Step 4: Engage with Your Audience 6. YouTube Analytics and Growth Tracking Step 1: Monitor Analytics Regularly Step 2: Adjust Content Based on Analytics 7. Monetization Strategies Step 1: Join the YouTube Partner Program (YPP) Step 2: Enable Ad Revenue Step 3: Explore Other Revenue Streams 8. Common Mistakes to Avoid By following these steps and continually learning and improving, you can create a successful YouTube channel and grow your presence over time. Creating a YouTube channel involves several steps, from setting it up properly to optimizing it for growth. Hereโ€™s a detailed guide to help you create a successful YouTube channel: Step 1: Sign in to YouTube Step 2: Create Your YouTube Channel Step 3: Customize Your Channel Step 4: Upload Your First Video Step 5: Optimize Your Videos Step 6: Organize Your Channel Step 7: Promote Your Channel Step 8: Monitor Your Channelโ€™s Performance Step 9: Monetization (Once Eligible) Tips for a Successful YouTube Channel By following these steps and tips, you can create a well-organized, attractive, and engaging YouTube channel that stands out. Growing a YouTube channel requires a combination of content strategy, audience engagement, and optimization techniques. Hereโ€™s a detailed guide to help you expand your channel effectively: 1. Content Strategy A. Find Your Niche B. Create High-Quality Content C. Develop Engaging Content Ideas 2. Video Optimization for YouTube SEO A. Use Compelling Titles B. Write a Detailed Description C. Add Tags to Your Video D. Create Custom Thumbnails E. Use End Screens and Cards 3. Audience Engagement A. Encourage Viewer Interaction B. Create Community Posts C. Go Live 4. Promoting Your Channel A. Leverage Social Media B. Collaborate with Other YouTubers C. Use Email Marketing 5. Analyzing Performance and Making Improvements A. Utilize YouTube Analytics B. Adjust Your Strategy Based on Data 6. Monetization and Growing Revenue A. Join the YouTube Partner Program B. Explore Other Revenue Streams 7. Avoiding Common Mistakes A. Inconsistent Posting Schedule B. Ignoring Video Analytics C. Poor Thumbnails and Titles D. Neglecting SEO Here are additional strategies and advanced tips to further grow a YouTube channel, covering advanced promotion techniques, community building, monetization tactics, and leveraging YouTubeโ€™s algorithm: 8. Advanced Promotion Techniques A. Leverage YouTube Shorts B. Use Paid Promotion and YouTube Ads C. Participate in YouTube Groups and Forums D. Utilize Email Outreach 9. Building a Strong Community A. Foster a Loyal Subscriber Base B. Encourage User-Generated Content C. Develop a Private Community Space 10. Understanding and Leveraging YouTubeโ€™s Algorithm A. Focus on Watch Time and Session Time B. Optimize for Suggested Videos C. Keep Consistent Audience Engagement 11. Monetization Techniques Beyond Ads A. Affiliate Marketing B. Create and Sell Digital Products C. Offer Premium Content or Memberships D. Create a Merchandise Store 12. Utilizing Analytics for Growth A. Monitor Traffic Sources B. Audience Demographics Analysis C. Experiment with Different Upload Times 13. Cross-Promoting on Other Platforms A. Use Your Other Social Media Channels B. Embed Videos in Blog Posts C. Start a Podcast 14. Staying Up-to-Date with YouTube Trends A. Follow YouTube Creator Updates B. Adapt Quickly to New Features 15. Avoiding Burnout While Growing A. Set Realistic Goals B. Take Breaks When Needed By employing these advanced strategies and continually refining your approach, you can build a stronger, more engaged YouTube community, maximize your reach, and achieve sustainable growth on the platform.

2024 Comprehensive Guide to Growing Your YouTube Channel: Tips, Strategies, and Best Practices Read More ยป

Migrating Your WordPress Website to Hostinger to Step-by-Step Guide.

Migrating Your WordPress Website to Hostinger to Step-by-Step Guide 2024.

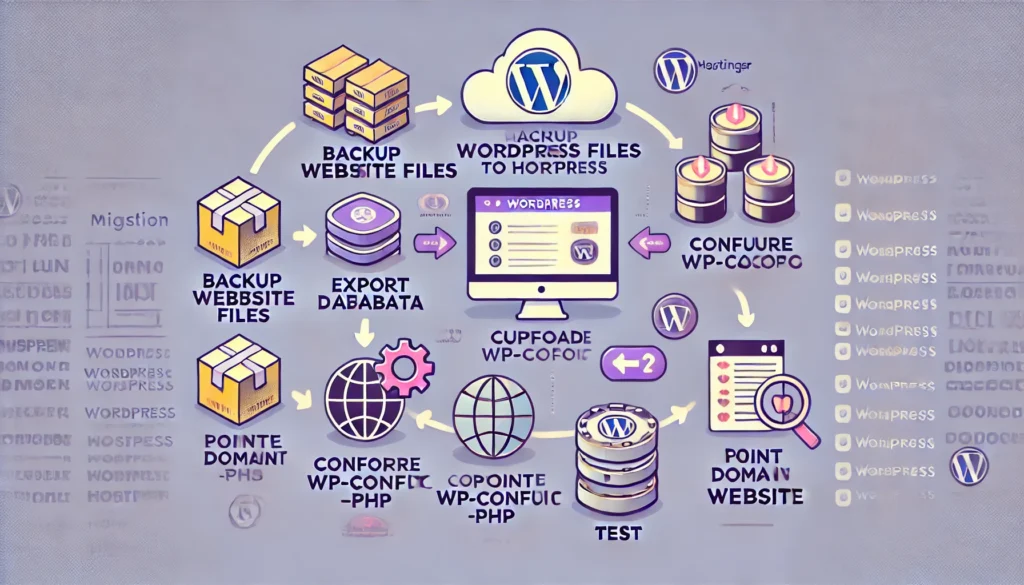
โ€œWP website migrateโ€ refers to the process of transferring a WordPress (WP) website from one hosting environment to another. This involves moving the websiteโ€™s files, database, and configuration settings to a new hosting provider, domain, or server Migrating Your WordPress Website to Hostinger to Step-by-Step Guide.. Common Reasons for Migrating a WordPress Website Key Components of a WordPress Website Migration Migration Methods Successful migration ensures that the website remains functional, with minimal downtime and no data loss during the transfer. Migrating a WordPress website to Hostinger can be important for several reasons, especially for those looking to take advantage of Hostingerโ€™s features, cost-effectiveness, and support. Hereโ€™s why it could be particularly beneficial: 1. Performance Optimization 2. Affordability 3. Ease of Management with hPanel 4. Free Migration Service 5. Improved Security 6. Global Data Centers 7. Scalability Options Summary Migrating your WordPress website to Hostinger can be an effective move if you are looking for better performance, lower costs, easy management, free migration services, and enhanced security. The process ensures your website runs smoothly on Hostingerโ€™s infrastructure while potentially benefiting from improved speed, SEO, and user experience. Letโ€™s walk through a specific example of migrating a WordPress website to Hostinger. Suppose you have a WordPress blog currently hosted on a different provider (letโ€™s call it โ€œOldHostโ€), and you want to migrate it to Hostinger to take advantage of better performance and lower costs. Example Scenario Step-by-Step Migration Example Step 1: Backup the Existing Website on โ€œOldHostโ€ Step 2: Prepare Hostinger for Migration Step 3: Upload the Website to Hostinger Step 4: Configure the wp-config.php File Step 5: Point the Domain to Hostinger Step 6: Test the Website on Hostinger Step 7: Enable SSL (Optional but Recommended) Results After completing these steps, your travel blog should now be successfully migrated to Hostinger. You may notice: This example covers the full process of migrating a WordPress website to Hostinger, from creating backups to updating configurations and testing. Letโ€™s walk through a specific example of migrating a WordPress website to Hostinger. Suppose you have a WordPress blog currently hosted on a different provider (letโ€™s call it โ€œOldHostโ€), and you want to migrate it to Hostinger to take advantage of better performance and lower costs. Example Scenario Step-by-Step Migration Example Step 1: Backup the Existing Website on โ€œOldHostโ€ Step 2: Prepare Hostinger for Migration Step 3: Upload the Website to Hostinger Step 4: Configure the wp-config.php File Step 5: Point the Domain to Hostinger Step 6: Test the Website on Hostinger Step 7: Enable SSL (Optional but Recommended) Results After completing these steps, your travel blog should now be successfully migrated to Hostinger. You may notice: This example covers the full process of migrating a WordPress website to Hostinger, from creating backups to updating configurations and testing.

Migrating Your WordPress Website to Hostinger to Step-by-Step Guide 2024. Read More ยป

Google Web Stories: A Complete Guide to Creating Engaging, Mobile-First Content In 2024

Google Web Stories: A Complete Guide to Creating Engaging, Mobile-First Content In 2024

Google Web Stories are a content format introduced by Google to deliver visually rich, immersive, and mobile-first experiences. They are essentially a form of Accelerated Mobile Pages (AMP), designed to showcase short, engaging stories similar to social media stories (like those on Instagram or Snapchat), but optimized for web consumption and discoverability through search engines. Key Features: Use Cases: Creation and Tools: Creating Google Web Stories can be done using tools like: Differences from Social Media Stories: Google Web Stories provide a unique way for publishers and brands to engage with audiences, combining the benefits of visual storytelling with the reach and discoverability of the open web. To create Google Web Stories in WordPress, you can follow these steps to set up, design, and publish your stories using the official Web Stories plugin provided by Google: Step 1: Install and Activate the Web Stories Plugin Step 2: Create a New Web Story Step 3: Design Your Web Story The Web Stories editor provides a drag-and-drop interface similar to page builders. Hereโ€™s how you can design your story: Step 4: Optimize Your Web Story Step 5: Publish or Schedule Your Web Story Optional: Embed Web Stories on Your Website To display Web Stories on your site: Tools and Resources for Designing By following these steps, you can create engaging, SEO-friendly Google Web Stories in WordPress, enhancing your content strategy with visually rich storytelling. To publish Web Stories in Google Search Console, follow these steps to ensure your stories are discoverable and optimized for search: Step 1: Verify Your Website in Google Search Console Before you can submit Web Stories, you need to make sure your website is verified in Google Search Console. Step 2: Make Sure Your Web Stories are Indexable Step 3: Submit Your Web Stories Sitemap (Optional but Recommended) To help Google discover your Web Stories more easily, you can create and submit a sitemap for your Web Stories. Step 4: Test Your Web Stories Using the URL Inspection Tool Step 5: Monitor Web Stories Performance Step 6: Troubleshoot Any Issues If Google Search Console reports any issues with your Web Stories (such as AMP validation errors), address these issues to ensure the stories can be properly indexed and displayed. By following these steps, you can help your Web Stories appear in Google Search results and other surfaces like Google Discover, ensuring they reach a wider audience. Google Web Stories Analytics Tracking traffic for Google Web Stories involves several methods and tools to analyze user engagement, interactions, and overall performance. Hereโ€™s how you can effectively track Web Stories traffic: 1. Google Analytics 2. Google Search Console 3. URL Tracking Parameters 4. Google Data Studio 5. Monitor Engagement Metrics 6. Social Media Insights 7. Feedback and Surveys 8. A/B Testing Conclusion By combining these tools and techniques, you can effectively track traffic and analyze the performance of your Google Web Stories, helping you understand your audience better and improve future content strategies.

Google Web Stories: A Complete Guide to Creating Engaging, Mobile-First Content In 2024 Read More ยป

The Ultimate Guide to Bloggers: Types, Roles, and Blogging Platforms in 2024

The Ultimate Guide to Bloggers: Types, Roles, and Blogging Platforms in 2024

A bloggers is a person who creates, maintains, and updates a blogโ€”a type of online journal or informational website where they share thoughts, experiences, information, or commentary on a variety of topics. Bloggers can focus on a wide range of subjects, including lifestyle, travel, fashion, technology, politics, fitness, food, personal finance, and much more. Their goal is often to inform, entertain, or connect with a specific audience through written content, images, videos, or other multimedia. History and Evolution of Blogging The term โ€œblogโ€ originated from the word โ€œweblog,โ€ which first appeared in the late 1990s as a way for individuals to maintain an online log or diary of their activities and ideas. Early bloggers were mainly tech enthusiasts who used the platform to share personal musings, discuss web development, and connect with like-minded individuals. Over time, blogging evolved from being a niche hobby into a mainstream form of communication and content creation, giving rise to professional bloggers and influencer culture. Roles and Responsibilities A bloggerโ€™s primary role involves writing and publishing content on their blog. The process often includes: Types of Bloggers Bloggers can be categorized into various types depending on the content they produce and their objectives: Skills and Tools Successful bloggers often possess a diverse set of skills, including: Blogging Platforms Several platforms make it easy to start a blog. Popular blogging platforms include: Impact and Influence Blogging has grown from a personal pastime into a powerful digital marketing tool. Many bloggers have significant influence, known as โ€œblogger influencers,โ€ where their recommendations can affect consumer behavior and trends. Blogs have become essential for businesses as well, serving as a platform for content marketing, thought leadership, and customer engagement. Challenges in Blogging While blogging offers many benefits, it comes with challenges, such as: Conclusion Bloggers play a dynamic role in the digital landscape, shaping online discussions, influencing trends, and connecting with diverse audiences. Whether pursued as a hobby or a profession, blogging continues to be a versatile and valuable form of self-expression and communication. A well-known example of a successful blogger is Pat Flynn, the founder of โ€œSmart Passive Income.โ€ Pat started blogging in 2008 to share his journey and insights on creating passive income streams after being laid off from his job. His blog focuses on entrepreneurship, online business, and passive income strategies. Through his content, Pat offers valuable advice on topics such as affiliate marketing, podcasting, digital products, and building online courses. He shares case studies, income reports, and personal experiences, which have helped him build a strong following and establish himself as an authority in the online business space. Patโ€™s blog has not only earned him significant income but also led to the creation of a larger platform that includes podcasts, YouTube channels, and online courses. His story is a great example of how blogging can evolve from a simple personal endeavor to a thriving business, inspiring and helping others along the way. Hereโ€™s an example of Blogger code that allows you to create a simple blog post template with some HTML and CSS. This code can be used within a Blogger theme to format a post layout. It includes elements like the post title, post date, author, and content. Explanation of the Code: This example provides a simple, styled layout for a Blogger blog post, with essential elements that can be customized further. Blogger is a user-friendly blogging platform owned by Google, allowing individuals and organizations to create and manage blogs. It offers a wide range of features and functions that make it easy to publish content, customize the appearance of blogs, and engage with readers. Below is a detailed overview of the main functions available on Blogger: 1. Post Creation and Management 2. Content Formatting and Editing 3. Themes and Customization 4. SEO and Traffic Management 5. Social Media Integration 6. Engagement and Community Building 7. Monetization Options 8. Backup and Import/Export 9. Security and Privacy Settings 10. Support and Community Resources 11. Mobile Functionality 12. Integration with Other Google Services Conclusion Blogger offers a comprehensive suite of functions that cater to both novice and experienced bloggers. With its ease of use, customization options, and integration with Google services, it remains a popular choice for individuals and organizations looking to establish an online presence. Whether for personal blogging, professional storytelling, or brand promotion, Blogger provides the tools necessary to create, manage, and grow a successful blog.

The Ultimate Guide to Bloggers: Types, Roles, and Blogging Platforms in 2024 Read More ยป

What is Google AdSense ? Complete Guide to Making Money with AdSense in 2024

What is Google AdSense ? Complete Guide to Making Money with AdSense in 2024.

What is Google AdSense? Google AdSense is an advertising program run by Google that allows website owners, bloggers, and YouTube content creators to earn money by displaying targeted ads on their sites or videos. It is one of the most popular and widely used online advertising programs in the world, providing an easy way for publishers to monetize their content. When visitors interact with these ads, such as by clicking on them or viewing them (depending on the ad type), the publisher earns a share of the advertising revenue. How Google AdSense Works AdSense operates on a pay-per-click (PPC) and pay-per-impression model, where advertisers pay Google to place their ads on relevant websites within the AdSense network. Google then shares a portion of this revenue with the publishers who display these ads. Hereโ€™s how the process works: Types of Ad Formats in AdSense Google AdSense offers various ad formats to suit different types of content and website layouts. The main ad formats include: Advantages of Using Google AdSense Challenges and Limitations of Google AdSense How to Maximize Earnings with Google AdSense Conclusion Google AdSense is a powerful tool for monetizing online content, whether you run a blog, a news site, or a YouTube channel. Its ease of use, wide range of ad formats, and reliable payment system make it a preferred choice for many content creators. However, to make the most of AdSense, it is important to optimize your ad placements, create quality content, and adhere to Googleโ€™s policies. While it may not generate substantial income for all publishers, it can be a valuable source of passive revenue when used effectively. Google AdSense is a popular online advertising program developed by Google that allows website owners and content creators to monetize their online content. It works by displaying targeted ads on the publisherโ€™s website, which can generate revenue when users view or click on these ads. AdSense is one of the most widely used online ad networks because it provides a user-friendly and efficient way for website owners, bloggers, and YouTube channel creators to earn money from their content without the need for direct advertiser relationships. How Google AdSense Works Key Features and Benefits of Google AdSense Ad Formats Supported by Google AdSense Common Requirements and Policies To maintain the quality and safety of the ad network, Google AdSense has strict policies that publishers must comply with: Google AdSense on YouTube AdSense is also used to monetize videos on YouTube. Content creators who meet certain eligibility criteria (such as a minimum number of subscribers and watch hours) can join the YouTube Partner Program, allowing ads to be displayed on their videos. Earnings are shared between the content creator and YouTube (which is owned by Google). Advantages and Disadvantages of Google AdSense Advantages: Disadvantages: Conclusion Google AdSense is a valuable tool for website owners, bloggers, and content creators who want to earn revenue by displaying ads on their online properties. While it offers an easy and automated way to monetize content, it requires compliance with strict guidelines and can be highly competitive. By delivering relevant and targeted ads to users, AdSense remains a popular choice for online monetization. A great example of using Google AdSense effectively is a niche blog focused on a specific topic, such as โ€œhealthy recipes for busy professionals.โ€ Letโ€™s break down how a blog like this can successfully use AdSense to generate revenue: Example: Healthy Recipes Blog Background:A food blogger named Sarah starts a website called โ€œQuick & Healthy Bitesโ€ that focuses on easy-to-make, nutritious recipes tailored for busy professionals. Sarah has a passion for cooking and nutrition and regularly shares recipes, cooking tips, and meal prep ideas. Setting Up AdSense: Ad Performance and Revenue: Additional Monetization Efforts:In addition to Google AdSense, Sarah partners with relevant brands for affiliate marketing, adding affiliate links to the blog. She also creates downloadable e-books and meal plans for sale. This multi-channel approach maximizes her income while keeping the user experience positive. Why This Example Works: This example demonstrates how Google AdSense can be effectively used to generate income from a well-targeted, content-rich website. To implement Google AdSense on a website, you need to integrate AdSense ad code provided by Google into your siteโ€™s HTML. Hereโ€™s an example of how to set up a basic AdSense ad unit on a website: Steps to Use Google AdSense Code Example of Google AdSense Code Hereโ€™s a basic example of an AdSense code snippet you might use on a website: Explanation of the Code: This script loads the AdSense library asynchronously to avoid slowing down the page. This script tells the AdSense library to show ads in the specified <ins> element. Where to Place the Code: Important Considerations: By implementing this code snippet properly, you can start displaying ads on your website and earning revenue through Google AdSense. Google AdSense supports a variety of ad formats and categories that can be used to optimize the way ads appear on your website or content. The categories in AdSense can be broadly classified into different types based on the ad format, content type, and the specific placement on the site. 1. Ad Format Categories These categories are based on the format or type of ad that can be displayed: 2. Content Category Targeting These categories determine the type of content for which ads are displayed: 3. Auto Ads Categories AdSense also offers Auto Ads, which automatically place ads across a website. The categories here include: 4. Ad Size Categories AdSense supports various ad sizes, which are grouped into: 5. YouTube Ad Categories (If Monetizing Videos) If using AdSense for monetizing videos on YouTube, the following ad types may be used: By understanding these categories, publishers can effectively optimize their AdSense setup to maximize revenue while maintaining a positive user experience. Google AdSense Summary Google AdSense is an online advertising program that enables website owners and content creators to monetize their sites by displaying targeted ads. The program works by serving ads relevant to the content

What is Google AdSense ? Complete Guide to Making Money with AdSense in 2024. Read More ยป

How to Create Effective Titles and Enclosures in Blogger for Better SEO 2024

How to Create Effective Titles and Enclosures in Blogger for Better SEO 2024

Title and Enclosure in Blogger: In-Depth Overview Blogger is a popular blogging platform that enables users to share content with a global audience. The title and enclosure are two critical components of a blog post that play significant roles in shaping the readerโ€™s experience and enhancing the blogโ€™s overall performance. Below is a comprehensive explanation of the title and enclosure, covering their purposes, best practices, and how to implement them effectively in Blogger. The Role of the Title in Blogger The title of a blog post is essentially the headline that represents the content. It is the first element readers see, both on the blog and in search engine results, social media shares, and email newsletters. The title has several important functions: Best Practices for Crafting Effective Titles in Blogger Steps to Add a Title in Blogger The Purpose of Enclosures in Blogger An โ€œenclosureโ€ in the context of blogging refers to multimedia elements such as images, videos, audio files, and even documents that can be embedded within a blog post. Enclosures enhance the quality of the content by providing additional context, engaging visuals, and other interactive elements. Here are some reasons why enclosures are important: Types of Enclosures You Can Use in Blogger How to Add Enclosures in Blogger Adding Images Embedding Videos Embedding Audio Adding Documents and PDFs Best Practices for Enclosures Conclusion The title and enclosures are fundamental elements that can greatly influence the success of a blog post on Blogger. A well-crafted title helps attract readers and improve SEO, while enclosures enhance engagement, provide additional context, and improve the visual appeal of the content. By following the best practices outlined here, you can create more compelling and user-friendly blog posts that resonate with your audience and achieve higher visibility online. Sure! Hereโ€™s an example of a blog post that incorporates effective titles and enclosures in Blogger. The example includes a suggested title, an introduction, the body of the post with enclosures, and a conclusion. Blog Post Example Title: 7 Proven Strategies to Boost Your Blog Traffic in 2024 Introduction: In the ever-evolving world of blogging, attracting traffic to your site is crucial for success. Whether youโ€™re a seasoned blogger or just starting, implementing effective strategies can significantly increase your readership. In this post, weโ€™ll explore seven proven strategies that can help you boost your blog traffic in 2024. 1. Optimize for SEO Search engine optimization (SEO) is vital for getting your blog posts discovered. Here are some quick tips to optimize your content: Image: Optimize your content for SEO by using relevant keywords and crafting compelling meta descriptions. Alt Text: Screenshot of keyword research tool showing keyword suggestions for a blog post. 2. Leverage Social Media Promoting your blog on social media platforms can significantly increase your visibility. Here are some effective tactics: Video: How to Effectively Promote Your Blog on Social MediaEmbed a relevant YouTube video explaining social media strategies for bloggers. 3. Create Quality Content Quality content is the backbone of any successful blog. Focus on creating posts that provide value to your readers. Infographic: The Importance of Quality Content in BloggingInsert an infographic summarizing key points about creating quality content. Alt Text: Infographic showing statistics on the importance of quality content in blogging. 4. Build an Email List Email marketing is a powerful tool for driving traffic to your blog. Hereโ€™s how to get started: Audio: The Power of Email Marketing for BloggersEmbed a short podcast episode discussing the benefits of email marketing. 5. Network with Other Bloggers Building relationships with other bloggers can open doors to new opportunities. 6. Utilize Analytics Tools Understanding your audienceโ€™s behavior is key to improving your blog. Use tools like Google Analytics to track: 7. Stay Consistent Consistency is crucial in blogging. Create a content calendar to plan and schedule your posts. This will help you stay organized and ensure you post regularly. Conclusion: Implementing these seven strategies can significantly boost your blog traffic in 2024. Focus on optimizing your content for SEO, leveraging social media, and creating high-quality posts. Additionally, building an email list and networking with other bloggers can further enhance your blogโ€™s reach. Remember, consistency is key! Start applying these tips today, and watch your blog grow. Final Notes In this example, the title is clear and enticing, the introduction sets the context, and each strategy is broken down into digestible sections. Enclosures such as images, videos, infographics, and audio segments enhance the content and provide readers with various ways to engage with the material. This approach can attract more readers and encourage them to interact with your blog. Creating a title and enclosure in Blogger is crucial for attracting readers and organizing content effectively. Below, Iโ€™ll explain the importance of titles and enclosures, along with detailed steps for implementing them in your Blogger posts. Importance of Title in Blogger Crafting Effective Titles Steps to Add a Title in Blogger Importance of Enclosures in Blogger Enclosures are a way to include multimedia elements such as images, videos, and audio in your blog posts. They enhance the visual appeal of your content and engage readers more effectively. Adding Enclosures in Blogger Images Videos Audio Steps to Publish with Enclosures Conclusion Crafting effective titles and utilizing enclosures in Blogger is essential for creating engaging and SEO-friendly blog posts. By following the steps outlined above, you can enhance the quality of your content, attract more readers, and improve your blogโ€™s performance in search engines. Remember to keep experimenting with different titles and multimedia elements to see what resonates best with your audience. Sure! Hereโ€™s a deeper dive into the importance and strategies for titles and enclosures in Blogger, along with some best practices and tips for enhancing your blogโ€™s overall effectiveness. Advanced Strategies for Crafting Titles Enclosure Best Practices Images Videos Audio Additional Tips for Enhancing Blog Posts Conclusion Creating compelling titles and effectively using enclosures like images, videos, and audio in your Blogger posts can significantly enhance your blogโ€™s appeal and performance. By following the

How to Create Effective Titles and Enclosures in Blogger for Better SEO 2024 Read More ยป

How to Easily Connect Google Analytics to Your WordPress Website: A Step-by-step in 2024

How to Easily Connect Google Analytics to Your WordPress Website: A Step-by-step in 2024

Connecting Google Analytics to a WordPress website allows you to track visitor behavior, traffic sources, and other important metrics to optimize your siteโ€™s performance. To integrate, first create a Google Analytics account and get the tracking code. You can then add the tracking code to your WordPress site using a plugin (like MonsterInsights or Site Kit) or manually by editing the themeโ€™s header. Once installed, you can verify the setup and configure additional tracking features, such as goals, Ecommerce tracking, and integration with Google Tag Manager for advanced insights. This setup helps improve marketing strategies and user experience. To connect Google Analytics to your WordPress website, follow these steps: 1. Create a Google Analytics Account (If Not Already Created) 2. Set Up a New Data Stream 3. Get the Google Analytics Tracking Code 4. Install the Tracking Code on Your WordPress Website There are several methods to add the tracking code to your WordPress site. Here are the most common methods: Method 1: Using a Plugin (Recommended for Beginners) Method 2: Manually Adding the Code to the Themeโ€™s Header Method 3: Using a Theme-Specific Option 5. Verify That Google Analytics is Working 6. Enable Enhanced Features (Optional) 7. Configure Google Analytics Settings (Optional) Summary Using a plugin like MonsterInsights or Site Kit simplifies the process and provides additional configuration options directly within the WordPress dashboard. Hereโ€™s a more in-depth look at connecting Google Analytics to a WordPress website, including additional details for advanced tracking, troubleshooting, and integration options: 8. Set Up Goals in Google Analytics (Optional) Goals help you track specific user actions on your website, such as form submissions, purchases, or time spent on a page. Hereโ€™s how to set up goals: 9. Enable Enhanced Ecommerce Tracking (Optional) For online stores, especially those using WooCommerce, tracking Ecommerce transactions is crucial. To enable Enhanced Ecommerce Tracking: 10. Utilize Google Tag Manager for Advanced Tracking Google Tag Manager (GTM) is a tool that simplifies managing and deploying marketing tags on your website. Hereโ€™s how to integrate GTM with WordPress and Google Analytics: 11. Integrate Google Analytics with Google Search Console Linking Google Analytics to Google Search Console allows you to see search queries that bring traffic to your site, and how those users behave once they arrive. To link the accounts: 12. Troubleshooting Common Issues 13. Privacy Considerations and GDPR Compliance If you have visitors from the European Union, make sure to comply with GDPR (General Data Protection Regulation) requirements: 14. Best Practices for Using Google Analytics 15. Migrating to GA4 (Google Analytics 4) Google Analytics 4 is the latest version of Google Analytics and offers advanced tracking features and an improved data model. To migrate to GA4: By following these steps, you can effectively connect Google Analytics to your WordPress website, gain valuable insights, and optimize your siteโ€™s performance. What is Google Analytics? Google Analytics is a free web analytics service offered by Google that tracks and reports website traffic. It provides valuable insights into how users interact with websites, allowing website owners and marketers to make informed decisions to optimize their sites and improve user experience. The service can track a wide range of metrics, such as page views, bounce rates, user demographics, conversion rates, and much more. Google Analytics offers two main versions: Key Features of Google Analytics How Google Analytics Works Differences Between Universal Analytics (UA) and Google Analytics 4 (GA4) Setting Up Google Analytics (Universal or GA4) Advanced Google Analytics Features Privacy and Data Compliance Conclusion Google Analytics is a powerful tool that offers comprehensive insights into website performance and user behavior. Whether you use Universal Analytics or the newer GA4, you can track traffic, conversions, and events to make data-driven decisions that enhance your websiteโ€™s effectiveness. Integrating Google Analytics with other Google services like Google Ads and Search Console further enriches your data, providing a holistic view of your online presence.

How to Easily Connect Google Analytics to Your WordPress Website: A Step-by-step in 2024 Read More ยป

Top 30 WordPress Plugins You Need for a High-Performing Website.

Top 30 WordPress Plugin You Need for a High-Performing Website.

The most important WordPress plugin tool for a WordPress website depends on the purpose of the site and the features you need. However, certain plugins are considered essential for most websites due to their role in enhancing functionality, security, SEO, performance, and overall management. Hereโ€™s a detailed description of the key types of plugins that are often deemed indispensable: 1. SEO Plugin (e.g., Yoast SEO or Rank Math) An SEO plugin is crucial for improving your websiteโ€™s search engine visibility. It helps optimize content, titles, meta descriptions, keywords, and overall SEO structure. It provides tools for: 2. Caching Plugin (e.g., W3 Total Cache or WP Super Cache) Performance is critical for a successful website. A caching plugin helps reduce load times, improving user experience and search engine rankings. These plugins: 3. Security Plugin (e.g., Wordfence or Sucuri Security) Security plugins are vital to protect your WordPress site from hacking attempts, malware, and other online threats. Features typically include: 4. Backup Plugin (e.g., UpdraftPlus or BackupBuddy) Having a backup system is essential for recovering from crashes, hacks, or accidental data loss. A good backup plugin offers: 5. Form Plugin (e.g., WPForms or Contact Form 7) Contact forms are essential for communication and lead generation. A form plugin offers: 6. E-commerce Plugin (e.g., WooCommerce) For online stores, an e-commerce plugin like WooCommerce transforms WordPress into a fully functional online store. Features include: 7. Analytics Plugin (e.g., MonsterInsights or Google Site Kit) Understanding user behavior on your site is key to optimizing content and performance. An analytics plugin helps you: 8. Image Optimization Plugin (e.g., Smush or ShortPixel) Images can slow down your website, so an image optimization plugin is essential for reducing file size without sacrificing quality. These plugins: 9. Social Media Plugin (e.g., Social Snap or Smash Balloon Social Feed) Social media plugins integrate your website with your social profiles, boosting engagement and reach. Common features include: 10. Page Builder Plugin (e.g., Elementor or Beaver Builder) A page builder plugin is ideal for creating custom layouts and designs without coding. It offers: Conclusion of WordPress plugin While the choice of plugins depends on your websiteโ€™s specific needs, having the right set of essential plugins ensures your WordPress site is secure, optimized, user-friendly, and SEO-ready. Installing plugins such as an SEO plugin, caching plugin, security plugin, and backup plugin forms the foundation of a well-rounded website, enhancing performance, protection, and visibility. Letโ€™s expand the description further by delving into additional plugins and specialized tools that can also play a crucial role in enhancing a WordPress websiteโ€™s functionality: 11. Email Marketing and Newsletter Plugin (e.g., Mailchimp for WordPress or MailPoet) Email marketing remains a powerful tool for engagement and retention. An email marketing plugin helps in building and managing subscriber lists, creating email campaigns, and tracking performance. Key features include: 12. Learning Management System (LMS) Plugin (e.g., LearnDash or LifterLMS) If you want to offer online courses, an LMS plugin can transform your WordPress website into a fully-fledged e-learning platform. It provides features like: 13. Multi-Language Plugin (e.g., WPML or Polylang) For websites with a global audience, a multi-language plugin is essential to translate content and serve visitors in their preferred language. These plugins typically offer: 14. Membership and Subscription Plugin (e.g., MemberPress or Restrict Content Pro) For sites offering premium content or membership-based services, a membership plugin helps manage subscriptions, user roles, and gated content. Features include: 15. Social Proof Plugin (e.g., TrustPulse or WP Social Proof) Social proof plugins boost credibility and conversions by showing recent activities on the site, such as purchases, sign-ups, or reviews. Key benefits include: 16. Table and Chart Plugins (e.g., TablePress or wpDataTables) For websites that need to present data in a structured format, table and chart plugins make it easy to create, customize, and display data-rich content. These plugins offer: 17. Customer Support and Live Chat Plugin (e.g., Tawk.to Live Chat or Zendesk Chat) Providing customer support directly on the website through live chat can significantly improve user satisfaction. Such plugins include: 18. Schema Markup Plugin (e.g., Schema Pro or WP Schema) Schema markup helps search engines understand the content on your site more clearly, which can improve visibility in search results through rich snippets. Features include: 19. Affiliate Management Plugin (e.g., AffiliateWP or ThirstyAffiliates) For websites that run affiliate programs, an affiliate management plugin is necessary to track and manage affiliate sales, commissions, and partners. These plugins provide: 20. Content Delivery Network (CDN) Plugin (e.g., Cloudflare or Jetpack) A CDN plugin is essential for improving website speed by delivering content from servers located closer to the userโ€™s geographical location. Benefits include: Conclusion For most WordPress sites, a combination of these plugins will greatly enhance functionality, performance, and user experience. From SEO and security to content management and customer engagement, leveraging the right tools can make a significant difference in your websiteโ€™s success. While itโ€™s important to choose plugins that meet your siteโ€™s specific needs, keeping a balance between essential plugins and lightweight design ensures that your site remains fast and reliable. Letโ€™s further expand on specialized tools and plugins that cater to even more specific needs for WordPress websites. Hereโ€™s an additional list to consider: 21. Database Optimization Plugin (e.g., WP-Optimize or Advanced Database Cleaner) WordPress databases can become cluttered with old data, revisions, and spam comments, leading to slower site performance. Database optimization plugins help: 22. Redirect Plugin (e.g., Redirection or 301 Redirects) Managing redirects is crucial for maintaining SEO and user experience, especially after making changes to your siteโ€™s structure or deleting old content. Redirect plugins offer: 23. Custom Post Types and Fields Plugin (e.g., Custom Post Type UI or Advanced Custom Fields) If your website needs to display specific types of content beyond standard posts and pages (e.g., portfolios, testimonials, events), custom post types and fields plugins are indispensable. They provide: 24. Gutenberg Block Plugin (e.g., Ultimate Addons for Gutenberg or Kadence Blocks) The Gutenberg editor, built into WordPress, allows for block-based content creation. Gutenberg block plugins extend its capabilities

Top 30 WordPress Plugin You Need for a High-Performing Website. Read More ยป

WordPress Site with Cloudflare

How to Optimize Your WordPress Site with Cloudflare: A Complete Guide.

How to Use Cloudflare for a WordPress Website Cloudflare is a popular Content Delivery Network (CDN) and security service that can help speed up your WordPress site and protect it from various online threats. It acts as a reverse proxy between your visitors and your hosting server, providing services such as DDoS protection, web application firewall (WAF), and global content delivery. Hereโ€™s a step-by-step guide on How to Optimize Your WordPress Site with Cloudflare. 1. Sign Up for a Cloudflare Account 2. Add Your WordPress Site to Cloudflare 3. Choose a Cloudflare Plan 4. Review Your DNS Records 5. Update Your Domainโ€™s Nameservers 6. Configure Cloudflare Settings for WordPress 7. Install the Cloudflare Plugin on Your WordPress Site 8. Optimize WordPress Performance with Cloudflare 9. Purge Cloudflare Cache When Necessary 10. Monitor Your Website Optimize Your WordPress Site with Cloudflare 11. Advanced Security Features 12. Additional Tips for Using Cloudflare with WordPress By following these steps, you can successfully integrate Cloudflare into your WordPress site, enhancing its performance, security, and reliability. Here are some additional details to further optimize the use of Cloudflare for your WordPress website, including some advanced configurations and troubleshooting tips: 13. Configuring DNS Settings for Optimal Performance 14. Optimize Cloudflareโ€™s Caching for WordPress 15. Setting Up Page Rules for Fine-Tuned Control 16. Cloudflare Workers for Advanced Customization 17. Improving Security with Cloudflare 18. Cloudflare Origin Certificate 19. Monitoring Performance and Analyzing Traffic 20. Troubleshooting Common Issues with Cloudflare and WordPress 21. Using Cloudflareโ€™s Advanced Features 22. Integrating Cloudflare with Other WordPress Plugins 23. Cloudflare for E-commerce Sites 24. Automatic Platform Optimization (APO) for WordPress 25. Utilizing Cloudflare Apps Setting up and configuring Cloudflare for your WordPress site can provide significant benefits in terms of performance, security, and reliability. By leveraging these advanced settings and features, you can fine-tune your siteโ€™s configuration to suit your needs while keeping it fast and secure. To further enhance your use of Cloudflare with a WordPress website, here are some more advanced strategies, settings, and troubleshooting techniques. 26. Cloudflare Workers for Custom Logic 27. Log Analysis with Cloudflare Logs 28. Cloudflare Access for Securing WordPress Admin Area 29. Setting Up Rate Limiting to Protect Against Abusive Behavior 30. Integrating Cloudflare with Web Application Firewalls (WAF) 31. Bot Management and Mitigation Techniques 32. Cloudflareโ€™s Image Resizing and Optimization Tools 33. Configure Cache-Control Headers for Advanced Caching 34. Protect Against Content Scraping and Spam 35. Monitoring and Alerts for Security Events 36. Advanced SSL/TLS Settings 37. Configuring Multiple Sites with Cloudflare 38. Using Cloudflare Registrar for Domain Registration 39. Integrating Cloudflare with CDNs and Third-Party Services 40. Cloudflare Tunnel for Secure Connections By implementing these strategies and exploring the full range of Cloudflareโ€™s features, you can significantly improve your WordPress websiteโ€™s speed, security, and reliability. This comprehensive approach ensures that you get the most out of Cloudflareโ€™s services while providing a great user experience for your visitors.

How to Optimize Your WordPress Site with Cloudflare: A Complete Guide. Read More ยป

How to Publish Your Own Website in the USA: Tips and Tricks.

How to Publish Your Own Website in the USA: Tips and Tricks 2024 .

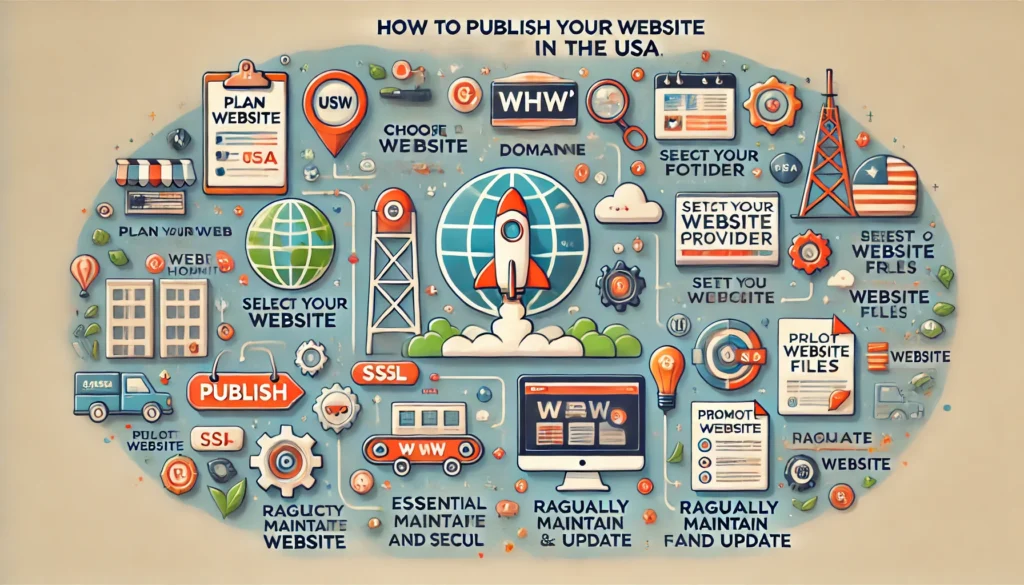
Publishing your own website in the USA involves several steps, from planning and building the site to securing a domain and hosting. Hereโ€™s a comprehensive guide on how to publish your own website: 1. Plan Your Website 2. Choose a Domain Name 3. Choose a Web Hosting Provider 4. Build Your Website 5. Set Up Essential Website Features 6. Upload Your Website Files 7. Test Your Website 8. Publish Your Website 9. Maintain and Update Your Website 10. Promote Your Website By following these steps, you can successfully publish your website in the USA and maintain a strong online presence. Hereโ€™s a more detailed breakdown of the steps to publish your own website in the USA: 1. Plan Your Website 2. Choose a Domain Name 3. Choose a Web Hosting Provider 4. Build Your Website 5. Set Up Essential Website Features 6. Upload Your Website Files 7. Test Your Website Thoroughly 8. Publish Your Website 9. Maintain and Update Your Website 10. Promote Your Website Additional Tips Publishing a website in the USA involves several moving parts, from planning and development to ongoing maintenance and marketing. By following these detailed steps, you can successfully launch a website and grow its online presence over time. Another approach to publishing your website in the USA is to use a more streamlined or alternative method, which involves simpler tools, platforms, and services. Hereโ€™s a different way to publish your website using an all-in-one platform or simplified process: 1. Use a Website Builder with Integrated Hosting 2. Select a Plan and Domain 3. Build Your Website Using the Built-In Tools 4. Preview and Publish Your Website 5. Manage and Maintain Your Website Alternative Methods to Consider Advantages and Disadvantages of This Approach Advantages: Disadvantages: Using an all-in-one website builder or a simplified platform is a practical and accessible approach for many users, especially those who want a quick and hassle-free way to publish a website in the USA.

How to Publish Your Own Website in the USA: Tips and Tricks 2024 . Read More ยป